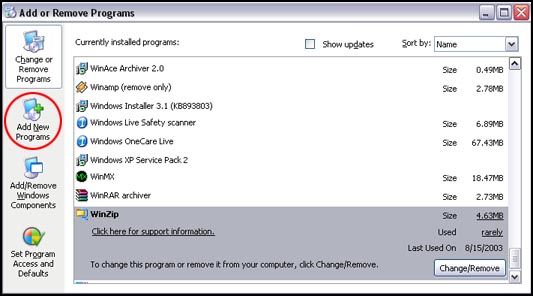
Once highlighted, it will display more detailed information, like how big it is and how often you use it, along with a button to Change/Remove it. Select this button.

Commonly, it will prompt you with a choice to either modify the installed features of the program, or to remove it. Select Remove and hit Next. It will then remove the software and prompt you once finished.

Enter the CD or disk of the software you wish to install onto the computer.
Select Add New Programs from the toolbar on the left.
Select to Add a program from CD-ROM or floppy disk.

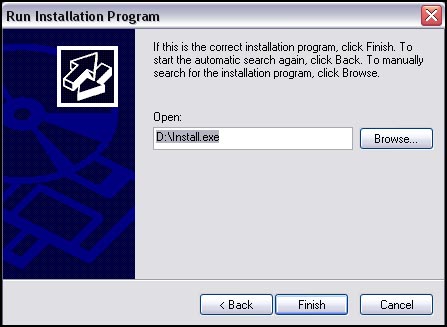
Windows will automatically locate the file needed to install the software, it will display that file on the next screen for your review. If it is appropriate, click finish to launch that file found, which will guide you through the software-specific installation program. Since it is different for every software, follow the on-screen instructions or consult with the installation information provided by the software company to complete the installation.