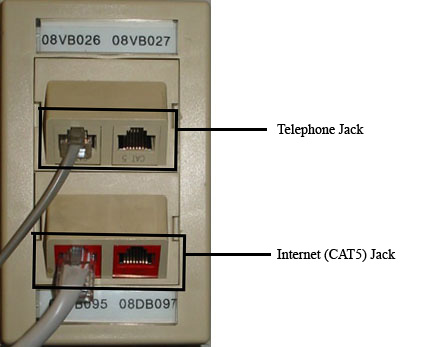
You can also look at the white labels above and below the ports. Those with a 'V' in their ID number are Voice Jacks, and those with a 'D' in their ID are the Data jacks, or Internet jacks.
There is ONE network jack per bed in the room. Please be sure to check behind furniture if you cannot find enough jacks.
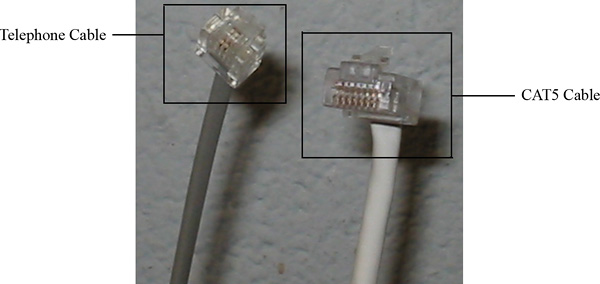
Be sure not to plug your cord into the wrong port or to confuse a phone cable with a CAT5 cable as this can result in hardware errors in the data jacks.
Phone cord vs. CAT5 connection:
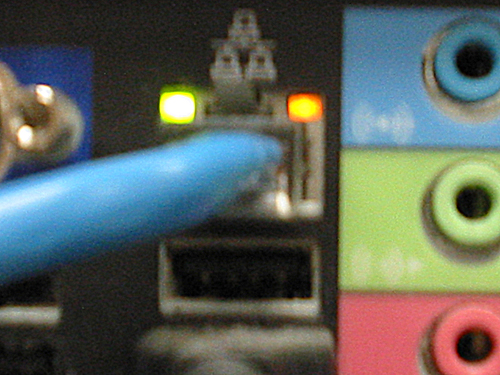
Now locate your computers Network Card connection (Located in the back of a desktop/side or back of laptops).
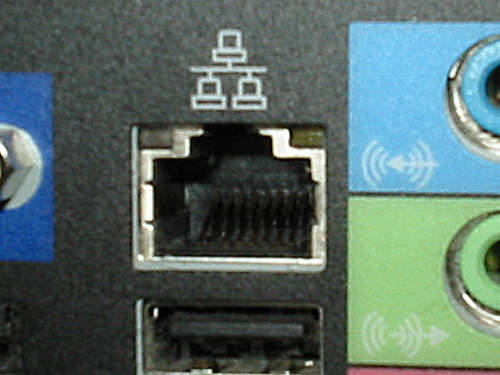
Once you've found your connection, plug your CAT5 Ethernet cable into it. Notice the lights are turned on.
This means that the LAN connection is working.
The network jacks on some computers do not have lights to indicate connectivity. If your computer doesn't have lights on it, you'll have to continue on to check if you have a connection.
If your network card does have lights, and they are not blinking as this point,
check that the cable is plugged in at both ends securely. If still you cannot get any lights, you may have
a bad network card, cable or even jack. Please contact the helpdesk: (215) 951 - 4648.
To check or repair your network settings start by opening your Control Panel (which is located on the main Start menu) and open your Network Connections. If you're in category view, you'll see this...
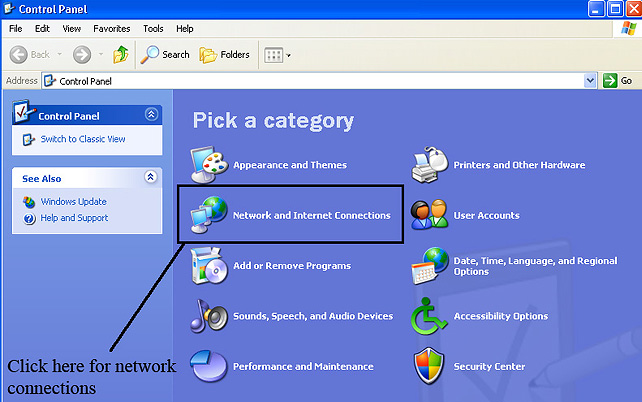
... but if you're in Classic View, you'll see this. Either way, open your Network Connections.

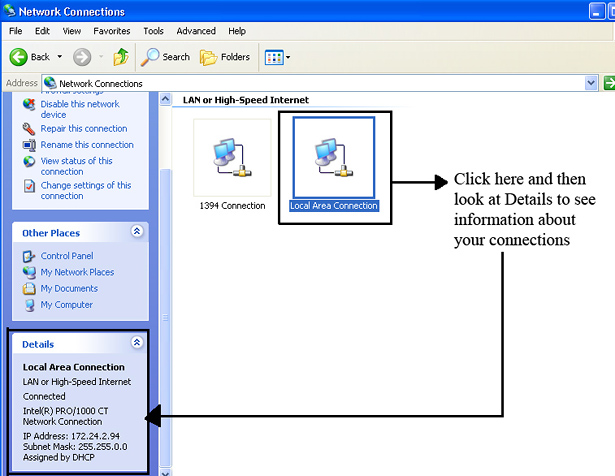
After you have clicked on Network Connections a window showing your connections should become visible. Click on Local Area Connection and then look at its details in the Details section in the left margin. (as shown in image below) The information in the details section tells you what your IP address is.
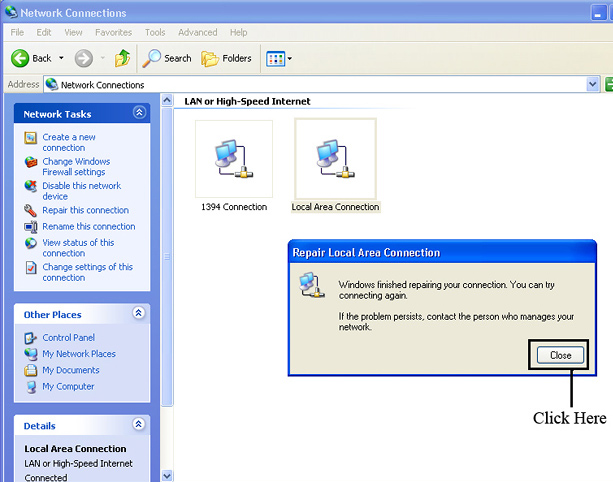
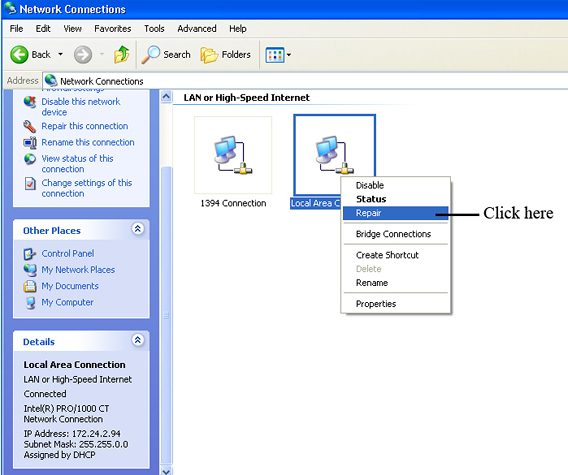
If you are experiencing problems with your Local Area Connection, right-click the Local Area Connection icon and then click on Repair. This should repair issues that you may be encountering.
After you click on Repair a window should pop-up repairing the Connection. When it is complete Click on close and you have completed repairing your Local Area Connection.