


The Getting Started window will be the first ting you see after installation. These windows walk you thought the most basic feature of SpywareBlaster. Read each window carefully to learn about SpywareBlaster's basic functionality. After you have finished reading the first window, hit "Next."

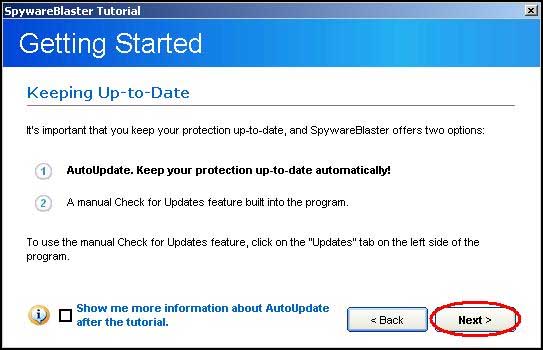
The second Getting Started window talks about your two main options for SpywareBlaster usage. The first of which, Auto-Updating, is a service that must be paid for, so for now we'll only worry about the second option, manual updating.
For now, leave the empty by default checkbox that the bottom left empty.
Auto-update is a feature that may be explored later at your own choosing. Again, hit Next to continue.
The final Getting started window simply thanks you for choosing SpywareBlaster. For more information on this software check the links provided. When finished, hit Finish to exit the Getting Started menu and begin using SpywareBlaster.
Because SpywareBlaster passively blocks spyware from ever being installed on your computer rather than actively scanning, updating the program and running it are essentially the same action. This makes SpywareBlaster a breeze to use.
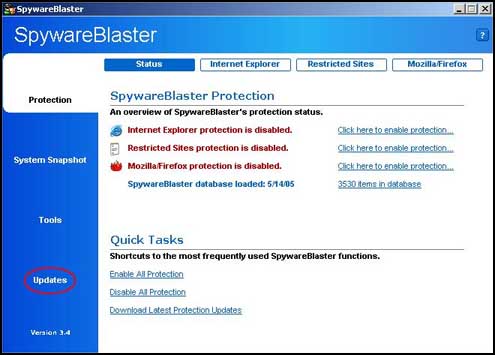
Starting form the main menu, the first step to using this program effectively is to update your spyware
definitions.
On the blue-shaded left hand menu, start by clicking the "Updates" option at the bottom on the screen.
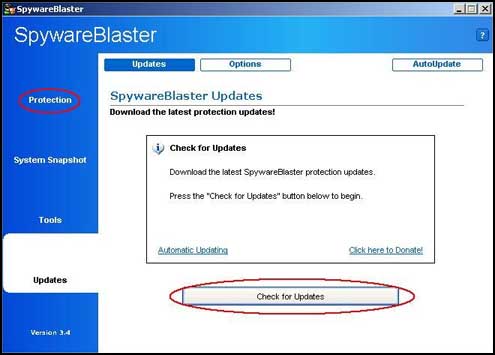
On the Updates menu, simply click the "Check for Updates" button to locate and available updates and have them automatically installed. After updating is complete, hit the "Protection" link on the side menu to return to the main menu.
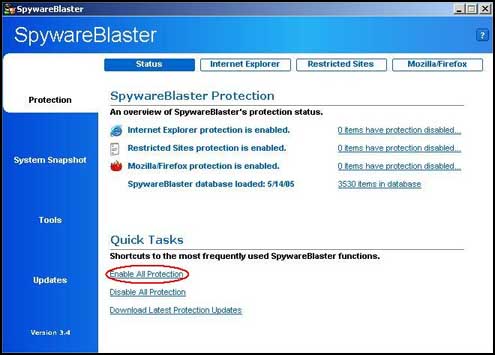
Finally, from the main menu, locate the "Enable All Protection" link on the lower "Quick Tasks" portion on the main window to activate your newly updated protection. And that's it! You are now fully updated against thousands of the most common typed of spyware. By checking for these updates once a week, you can ensure your system will remain spyware free.
- Official SpywareBlaster Website
- SpywareBlaster FAQ Page
Philadelphia University Help Desk - 215-951-4648 or E-mail: helpdesk@philau.edu